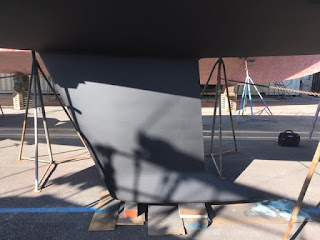
As we sit four months out from the start of the 2020 Pacific Cup - it's time for periodic maintenance on the boat and handling things that can only be done at the boat yard. Three main objectives for this trip to the yard: 1) new bottom paint, 2) drop out the rudder to inspect the shaft and bearings, and 3) replace the standing rigging. First the bottom paint. We've been using Micron 66 since we bought the boat and it has worked well. It's an ablative paint that is "self polishing" and only requires a wipe down with a microfiber rag while the boat is in the water (makes it easy for me since I clean the bottom). We opted to spray two coats rather than roll on the paint as we have in the past. Came out super smooth!
Before:
After:
When we purchased the boat in 2016 we replaced the lower rudder bearing and it's been operating smoothly since. Given all the rudder failure problems encountered during this past summer's TransPac race, we figured after four years and +2,500 miles it was time to make sure everything still looked good. We dropped out the rudder and cleaned and inspected the shaft and bearings. Fortunately, everything still looks good and now the wheel/rudder turns even more smoothly, if that's possible, than before.


As I went through all the documentation for the boat I wasn't able to prove that the standing rod rigging was anything other than original to the boat (so that's over 20 years old). We had inspected the rigging very closely prior to the 2018 race and when the mast was re-stepped when we got the boat back from Hawaii. We didn't notice anything out of the ordinary, but we're getting ready to sail to and back from Hawaii again and figured it would be prudent to replace the rod. This went very smoothly - I had disconnected everything (boom, electronics, etc.) so that all the yard needed to do was pull the mast. The old rod was removed, new rod fabricated, and everything re-assembled. While the mast was down I took the opportunity to dis-assemble and lubricate all the halyard sheaves after noticing that the port spinnaker halyard was not running as smoothly as the others. Just spending time now getting everything re-tuned (proper rig tension) now that the boat is all back together and in the water.


While I was putting everything back together I noticed that the side plates on the triple block on the boomvang control line were broken and the ball bearings about to fall out. I replaced the triple with a Harken 40mm carbo airblock and as the line was getting pretty worn, replaced that as well with some 5/16" Warpspeed. Everything runs smoothly now.

One last thing that's always been a pain when removing the mast is disconnecting the wires that run up the mast (electrical for the mast head tricolor light and the steaming light, VHF antenna cable, and two NMEA2000 cables for the mast head wind instrument and the mast mounted displays). All these cables ultimately run into the cabinet behind the head through a small hole. This hole is too small to pass the end fittings of the NMEA2000 cables without removing the DC main electrical cable and the VHF antenna cable. All that means more stuff to disconnect. Rather than dealing with this in the future every time we remove the mast, I decided to cut the hold bigger. The hole is covered by teak trim pieces so you don't see it when everything is re-assembled. Problem solved!

The preparation list is pretty short now that this work has been completed. Just some minor maintenance - cleaning the water tanks and servicing the winches. We'll be focusing our time on doing some person overboard practice, re-familiarizing ourselves with the emergency rudder setup and storm sails, and preparing for our inspection. The count down continues....


